Introduction
A consistent posting schedule is the foundation of successful content strategy. GetFeed's Posting Schedule feature allows you to configure recurring time slots that automatically appear in your calendar, making it easy to maintain a regular publishing cadence without manually scheduling each post.
Why Consistency Matters
Prerequisites
Before configuring your schedule, ensure you have:
- An active GetFeed account
- Organization admin or owner permissions
- At least one social media account connected (optional, but recommended)
What is the Posting Schedule?
The Posting Schedule is a time management tool that creates a reusable publishing template for your week. Instead of manually picking times for each post, you define your preferred posting times once, and they automatically appear as quick-add slots in your Calendar view.
| Feature | Benefit |
|---|---|
| Recurring Time Slots | Define posting times that repeat weekly |
| Day-by-Day Configuration | Customize different schedules for each day |
| Enable/Disable Toggles | Temporarily pause slots without deleting them |
| Clone Feature | Copy one day's schedule to another instantly |
| Apply Recommended | Use platform-optimized times with one click |
Navigating to Schedule Settings
Open Settings
From your GetFeed dashboard, click on "Settings" in the left sidebar navigation.
Go to Organization Settings
In the Settings sidebar, find the "Administration" section and click on "Schedule". This takes you to the Posting Schedule configuration page.
The navigation path is: Settings → Organization → Schedule
Setting Up Your Time Slots
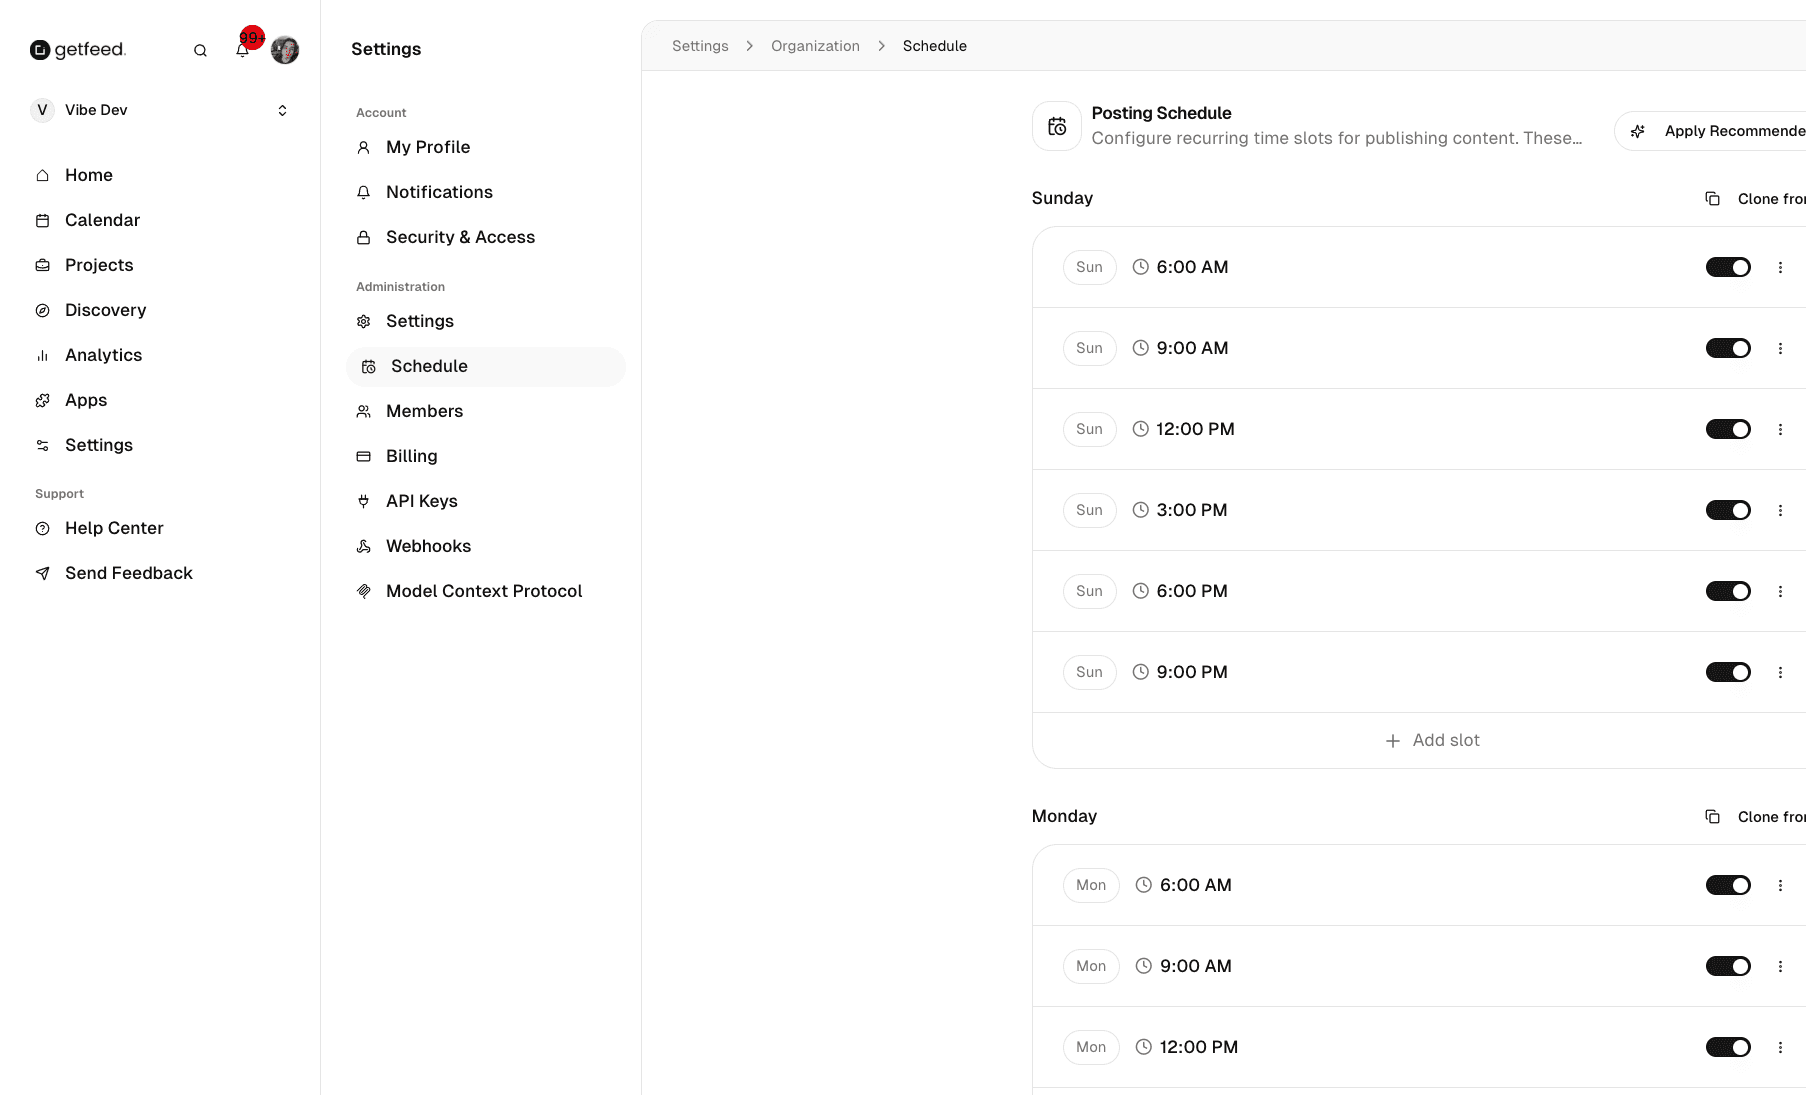
The Posting Schedule page displays all seven days of the week, each with its own set of configurable time slots.
Understanding the Layout
Each day shows:
- Day heading (e.g., "Monday", "Tuesday")
- Clone from button: Copy slots from another day
- Time slot cards: Each configured posting time
- Add slot button: Create new time slots
Adding a New Time Slot
To add a new posting time:
- Find the day you want to configure
- Click the "Add slot" button at the bottom of that day's slot list
- Select your preferred time from the time picker
- The slot is immediately saved and will appear in your Calendar
Time Zone Note
Enabling or Disabling Slots
Each time slot has a toggle switch on the right side:
- Enabled (checked): The slot appears in your Calendar as a quick-add option
- Disabled (unchecked): The slot is hidden from your Calendar but not deleted
Use this to temporarily pause certain posting times (e.g., during holidays) without losing your configuration.
Editing or Deleting Slots
Click the three-dot menu next to any slot to:
- Edit: Change the time for this slot
- Delete: Permanently remove the slot
Deleting a slot does not affect any posts already scheduled at that time.
Time-Saving Features
Apply Recommended
Not sure when to post? Click the "Apply Recommended" button at the top of the page to automatically populate your schedule with platform-optimized posting times based on industry best practices.
This sets up a proven schedule including:
- Morning slots (6:00 AM, 9:00 AM)
- Midday slots (12:00 PM)
- Afternoon slots (3:00 PM)
- Evening slots (6:00 PM, 9:00 PM)
Customization Tip
Clone From
The "Clone from" feature is a massive time-saver when you want the same schedule across multiple days.
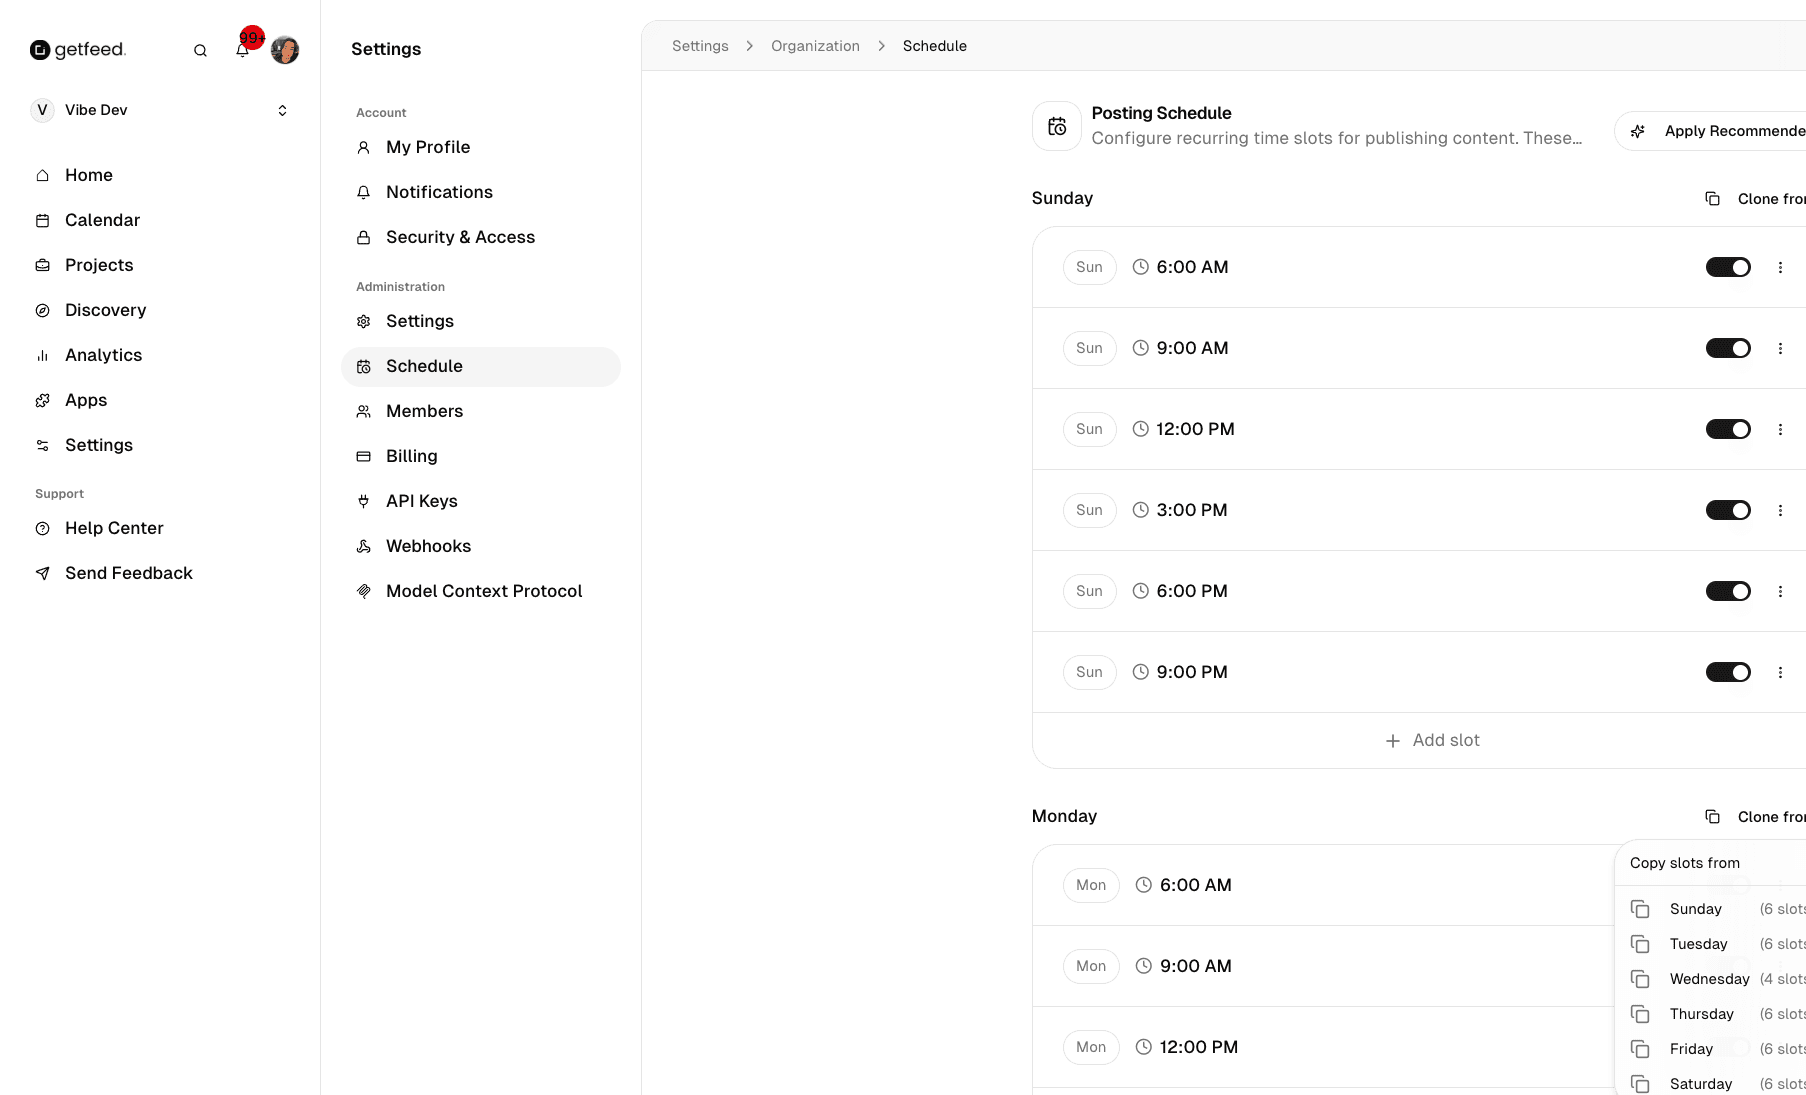
Open the Clone Menu
Find the day you want to configure (the destination) and click the "Clone from" button next to its heading.
Select a Source Day
A dropdown menu appears showing all other days with their slot counts (e.g., "Sunday (6 slots)"). Click on the day you want to copy from.
Slots Are Cloned Instantly
All time slots from the source day are immediately copied to the destination day. Existing slots on the destination day are replaced.
Example Workflow:
- Set up your ideal Monday schedule with 6 time slots
- Click "Clone from" on Tuesday through Friday
- Select "Monday" for each to copy the weekday schedule
- Customize Saturday and Sunday separately for weekend posting
How the Schedule Works with the Calendar
Once you've configured your Posting Schedule, the magic happens in the Calendar view.
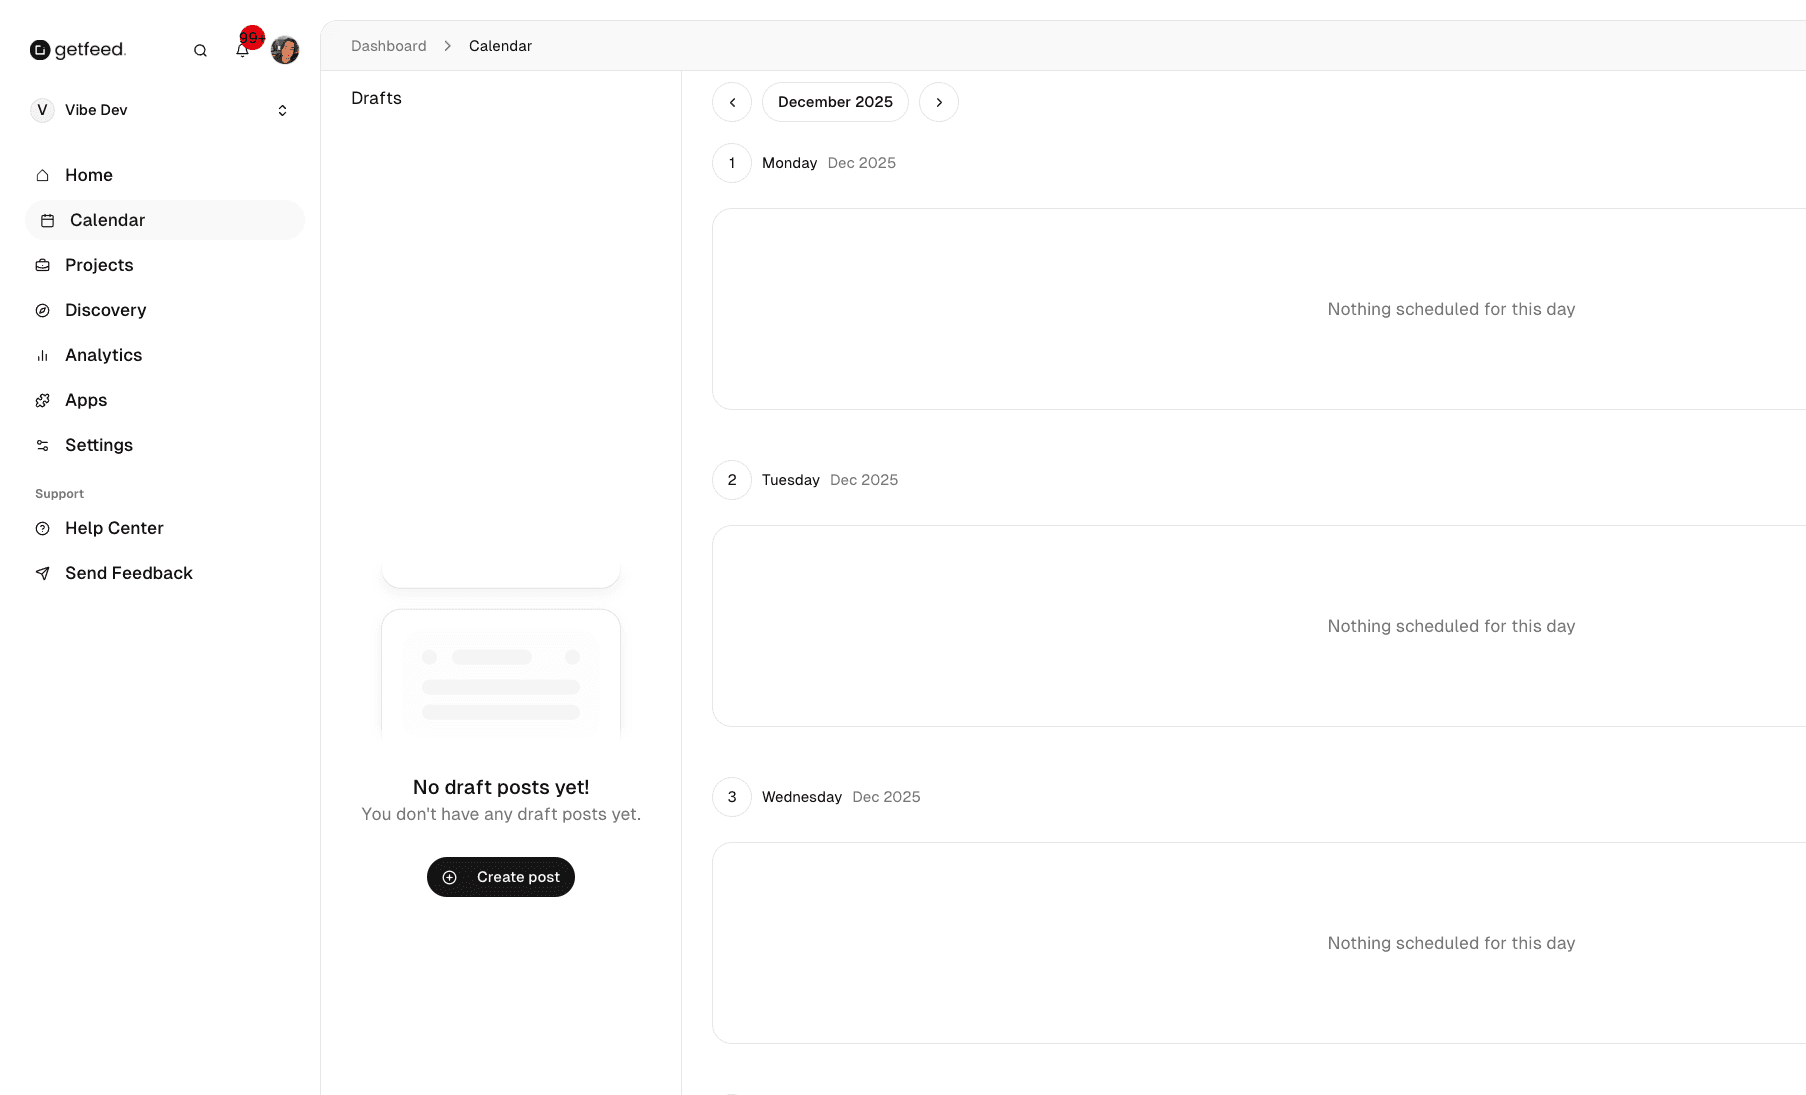
Time Slots in Calendar
When you navigate to Calendar in the main sidebar:
- Each day displays your configured time slots
- Slots appear as quick-add buttons with the time displayed
- Click the "+" icon next to any slot to create a post for that time
Benefits of Scheduled Slots
| Without Schedule | With Schedule |
|---|---|
| Manually pick time for each post | Click pre-configured slot |
| Inconsistent posting times | Consistent, predictable schedule |
| Easy to forget optimal times | Optimal times always visible |
| More clicks to schedule | One-click scheduling |
Link to Schedule Settings
The Calendar page includes a "Schedule Settings" link in the header for quick access to modify your posting times without leaving the workflow.
Best Practices
Troubleshooting
Next Steps
With your Posting Schedule configured, you're ready to streamline your publishing workflow:
- Create content: Upload videos and generate clips from the Home page
- Edit your clips: Use the Video Editor to add captions and branding
- Schedule posts: Use the Calendar to assign clips to your configured time slots
- Monitor performance: Check Analytics to optimize your posting times
Need content ideas?
Read More